I saw this cute cat in the window of Anny Blatt’s yarn shop in Nice. Dan also saw it, and immediately fell in love with it. So of course I had to buy the yarn, and get the pattern from very helpful ladies who work there. I got the pattern for free, on a A4 page with what looked like bits cut out from a magazine and put together on one page. The pattern itself is super easy, it’s assembly that does the trick. And assembly was described really confusingly on that little sheet, to the point of being wrong. Moreover, by the time I got to the tail, I lost the paper, and had to re-invent it myself. So I decided to put the patter along with detailed assembly tutorial here on my blog. I hope no one minds. Before doing so, I googled and searched internet for a few days, but could not find anything looking similar. So here we go, with a few notes before I start.
Firstly, I think this is a great project for very early beginners. It’s so much more fun, and is done much quicker than traditional hats and scarves, and looks more complex than a dishcloth. However, you only make two rectangles in stockinette stitch, and for the tail, it’s the same with a couple of decreases.
Secondly, if I made it again, I would make the head a bit smaller, but maybe that’s just me.
So, the little beige cat:
Skills you’ll need: cast on, knit, purl, bind off, knit 2 together, skp/ssk – optional. Seaming: whip stitch can be enough, I also used back stitch. You could also use mattress stitch for best results, but I was too lazy.
Materials and tools: 1 ball of Anny Blatt Angora Super (106 m/25 gr, 70% angora, 30% wool), a bit of dark gray or dark brown yarn to embroider the face, a bit of bright yarn for the bow tie (or you can use ribbon), 3 mm needles , darning needle, 3 mm crochet hook (optional – for the bow tie). Stuffing.
Substituting: I would recommend to stick to angora blends, make the kitty fluffy, but I suppose you could use any yarn you like.
Gauge: I didn’t measure mine :( and now it’s too late. It’s not essential though. If you have different gauge, you’ll get a differently sized cat in the end. Your fabric should be soft enough but not sloppy.
Abbreviations:
c/o – cast on
k – knit
p – purl
k2tog – knit 2 stitches together.
skp – slip next stitch on the right needle, knit the stitch after, passe the slipped stitch over the knitted one. Can be replaced by ssk or even k2tog.
BODY
C/o 36 stitches.
Row 1. Knit all stitches
Row 2. Purl all stitches
Repeat rows 1&2 (stockinette stitch), until you have 56 rows. Bind off loosely.
HEAD
C/o 23 stitches. Knit in stockinette stitch for 56 rows. Bind off.
TAIL
C/o 16 stitches.
Row 1: knit
Row 2, and all other even rows: purl.
Row 3: k1, skp, k 10, k2tog, k1
Row 5: knit
Row 7: k1, skp, k 8, k2tog, k1
Row 9: knit
Row 11: k1, skp, k 6, k2tog, k1
Row 13: knit
Row 15: k1, skp, k 4, k2tog, k1
Row 17: knit
Row 19: k1, skp, k 2, k2tog, k1
Bind off after row 20.
ASSEMBLY:
Body. That’s the trickiest part. Here’s the schematic of your rectangle to help:
1. I used back stitch for leg seams, so I had the wrong side facing me. Measure the middle of your narrow edge (cast on side). That’s point E.
2. Fold the fabric, so that point E is on the long edge, – point G.
3. Sew the seam of A-EG, with wrong side on the outside. That’s the first leg of the cat.
3. Now fold to the other side, so that point E (and now G) meet with point H
4. Sew the B-EH seam. That’s your second leg.
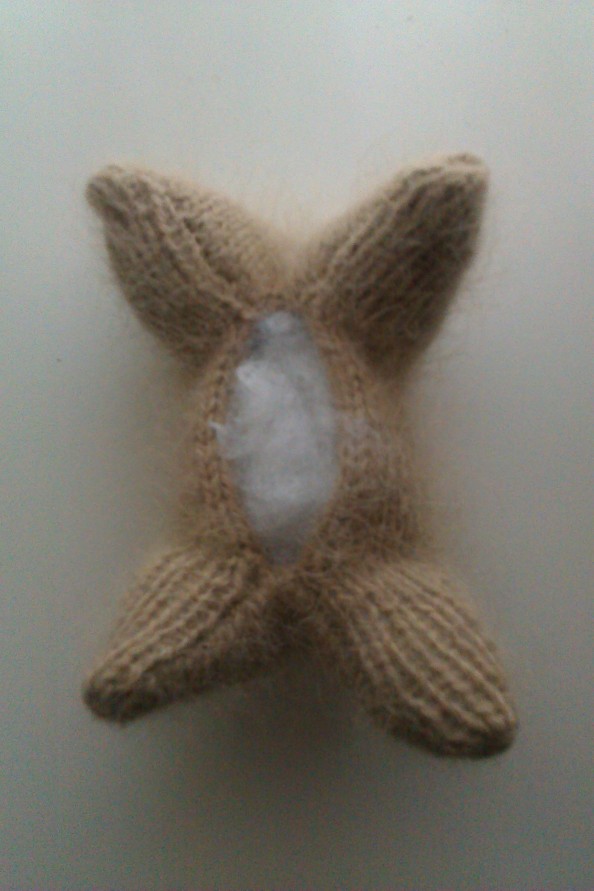
5. Now do the same with the other side, by sewing D-FI and C-FJ seams. you now have 4 paws.
6. Turn the the body inside out, so that right side is on the outside.
7. Stuff the body through the opening.
8. Close the belly seam (GEH-IFJ). I used the whip stitch.
The body is ready.
Face
1. Fold in two lengthwise, so that you have a square.
2. With wrong side facing out, sew the side seams.
3. Turn inside out, now right side is facing. Stuff the face lightly.
4. Make simple stitch diagonal seams from the top of the head to the sides, to form ears.
5. Thread yarn using simple stitch through the bottom edge, and pull lightly to form the neck.
6. Sew the head to the body.
7. Embroider the face. Here’s an approximate layout. If the toy is for an older child, you could put buttons for eyes.
Tail
1. With wrong side facing out, fold the tail in two, sew the top (bind off) and the side seams to form a cone.
2. Turn inside out and stuff lightly.
3. Sew to the body.
Use a ribbon, or make one – simple crochet chain would do, and tie around the neck.
You’re done!


