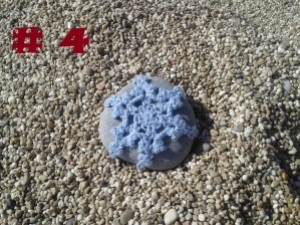
Here’s the recipe for stone #4 from this post.
I used fingering/4-ply wool and 2.5mm / B/C hook. The stone was 7.5 cm ( 3 in) in diameter
This “jacket” is made of two motives, second joined as-you-go to the first one.
I like my “jackets” to fit really tightly over the stones. I put my work against the stone very often to make sure it’s coming out the right size.
Side 1
Start with magic loop.
Round 1 – ch3, 11 dc, sl st in 3rd ch to finish the round.
Round 2 – ch3, dc in the same st, *ch 3, sk next dc, 3dc in next dc* around, finish with ch 3, dc in the same st as first ch3, sl st in the 3rd ch.
Round 3 – *[ch3, sl st , ch 5, sl st, ch 3, sl st, all in the same st = trellis], ch2, dc in the same st, trellis in the top of dc, ch 2, trellis in the same st as the first trellins and dc , 2 sc in the next ch3-sp, sk dc, sl st in the next dc*. F/O, weave in ends.
Side 2
Side 2 is done exactly the same as side 1. Weave in the end from magic loop before starting round 3.
In round 3 you will be joining both sides together. Place side 1 with wring side facing you. In the beginning work with just two sides of the “jacket” held together. Once you are about 2/3 through the round, insert the stone and continue working. Remember to have all ends weaved in before starting to join the sides together.
For round 3, still follow instructions for side 1, only when you do second trellis – into the top of extra dc, instead of ch5 make ch2, sl st in to ch5 of the same trellis of side 1, ch2.
Here’s a link to tutorial on how to join elements with sl st.
Based on this pattern from Aesthetic Nest
